|
How to use Tag List Mapper
•Launch X4D Data Import.
•Select Project and login.
•Head to the Tag List Mapper Tab on the top left corner of the screen.
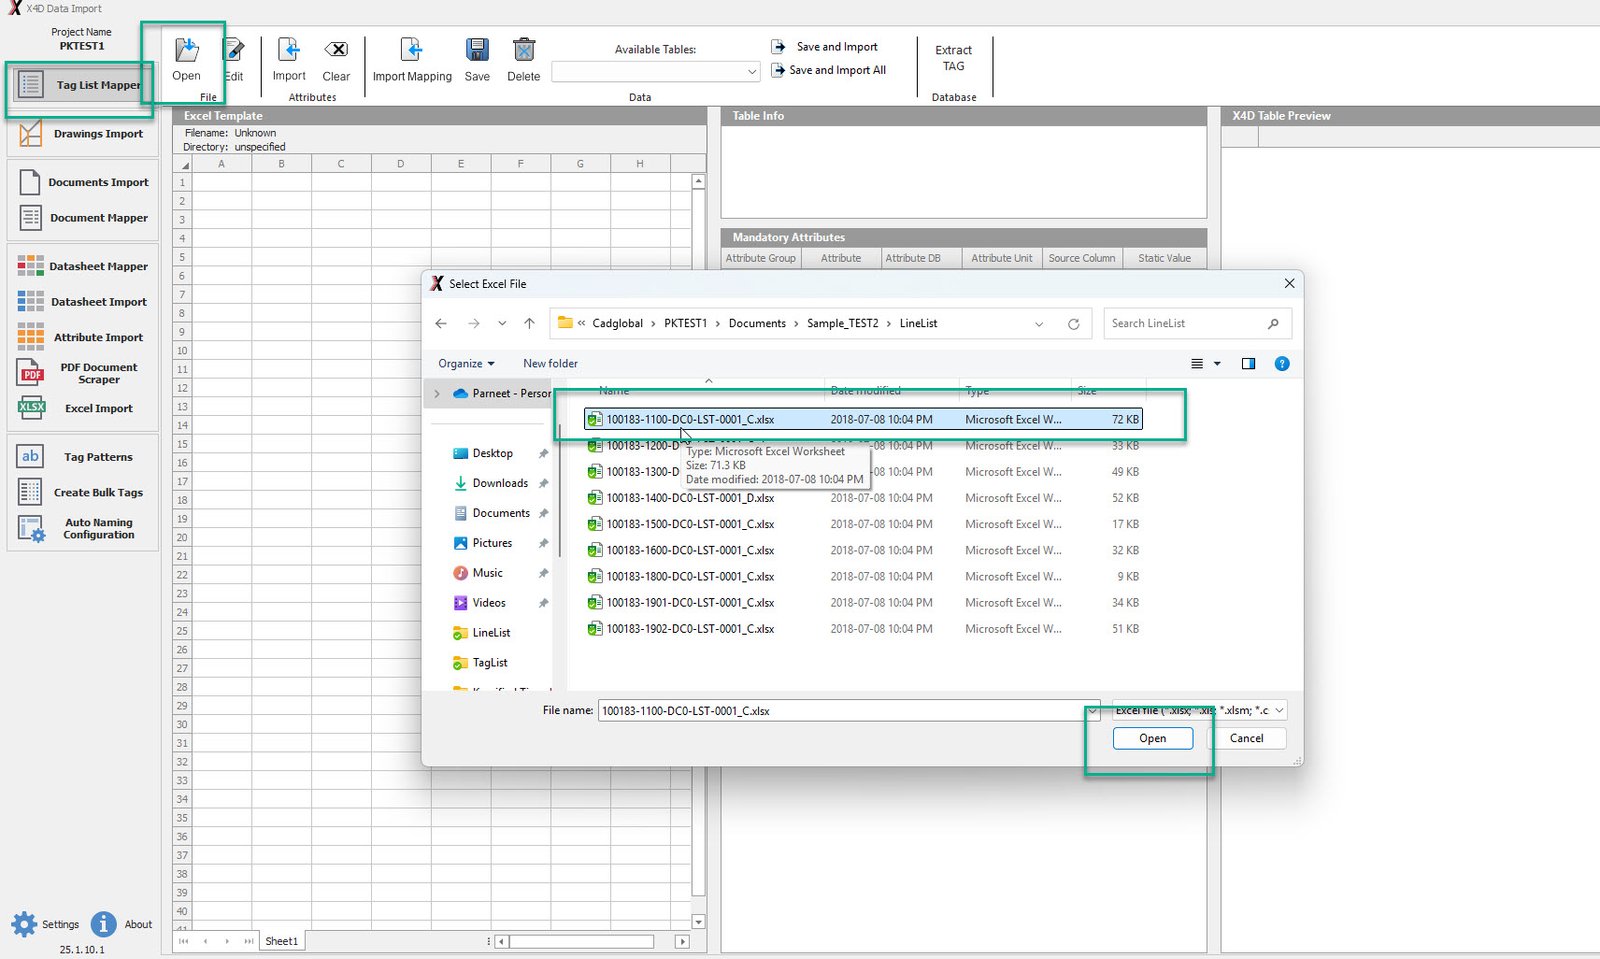
•Click "Open".
•Select the .xlsx file from the LineList and Click "Open"
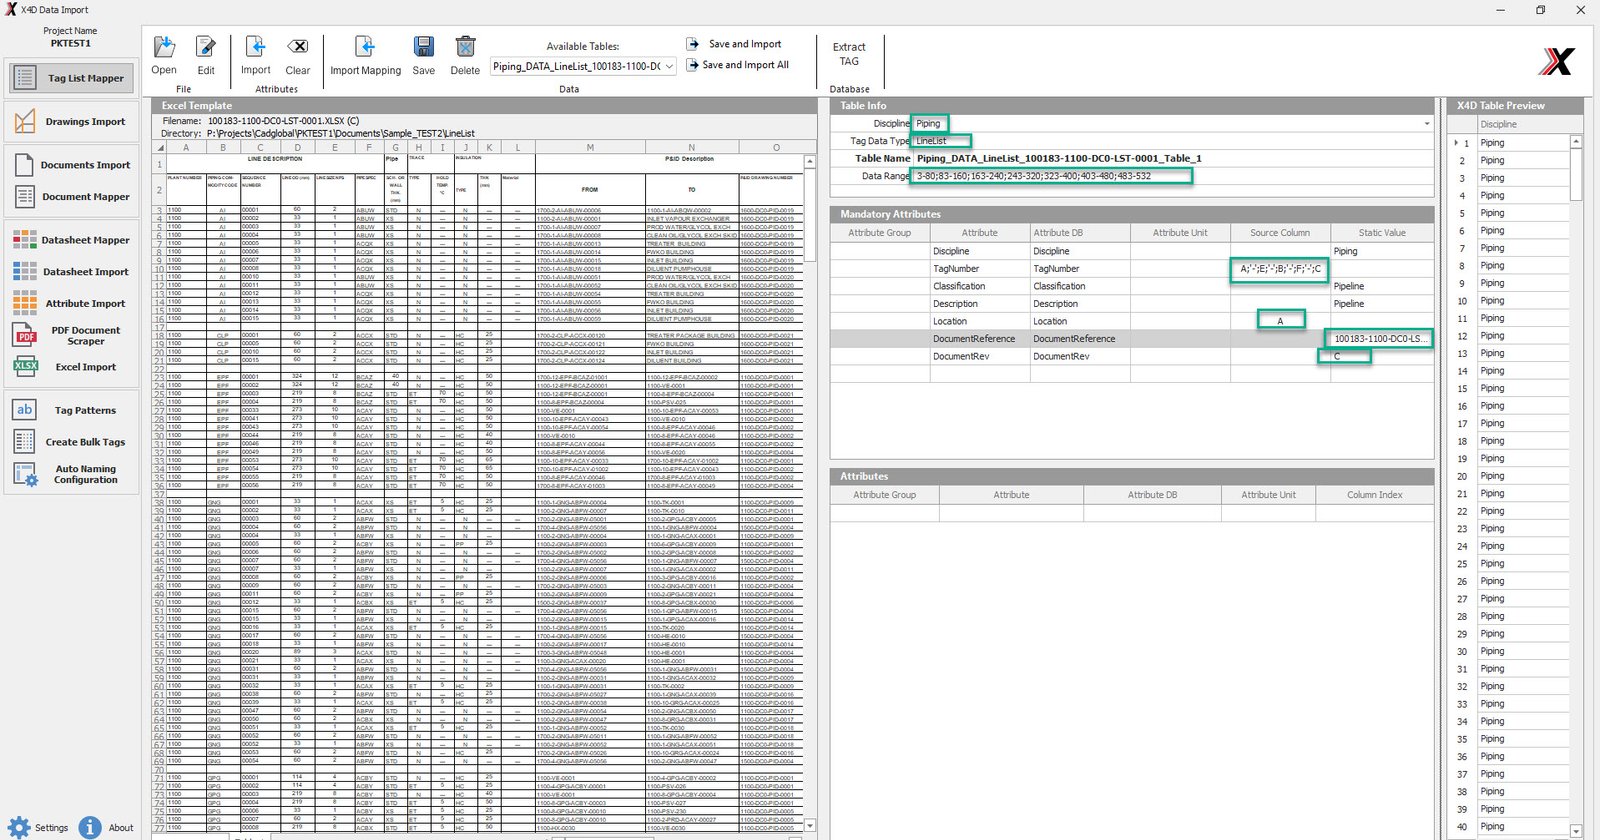
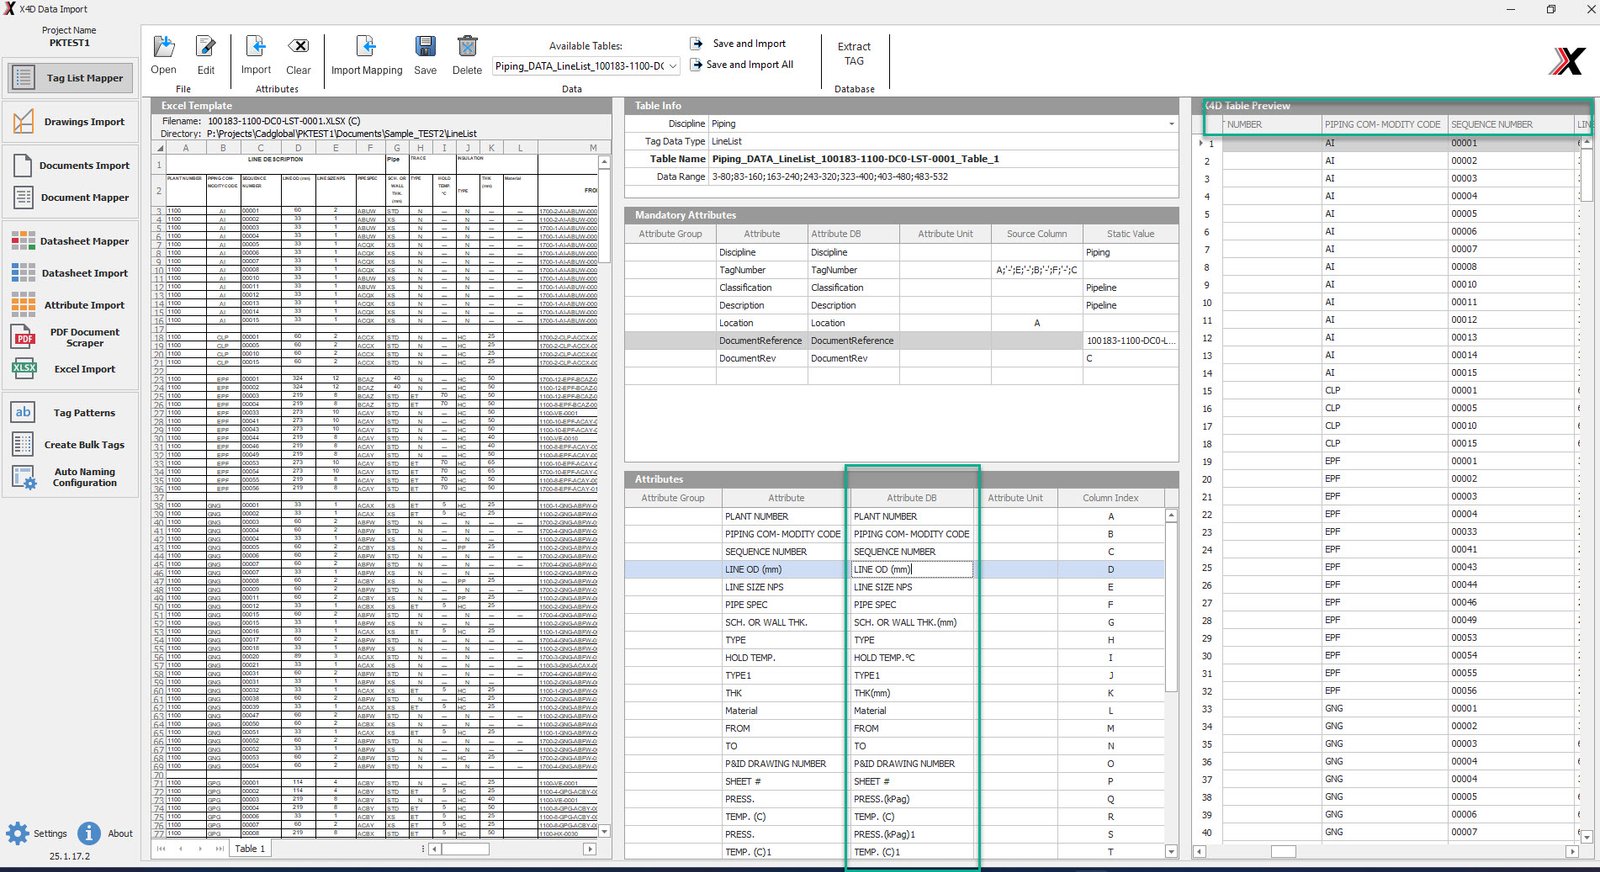
•Once the .xlsx file is open, head to the Table Info Tab.
•Define the Discipline, Tag Data Type, Data Range.
•Under the Mandatory Attributes Tab, Define the Source Column/Static Value for the various Attributes. Column Location can be dragged and droped.
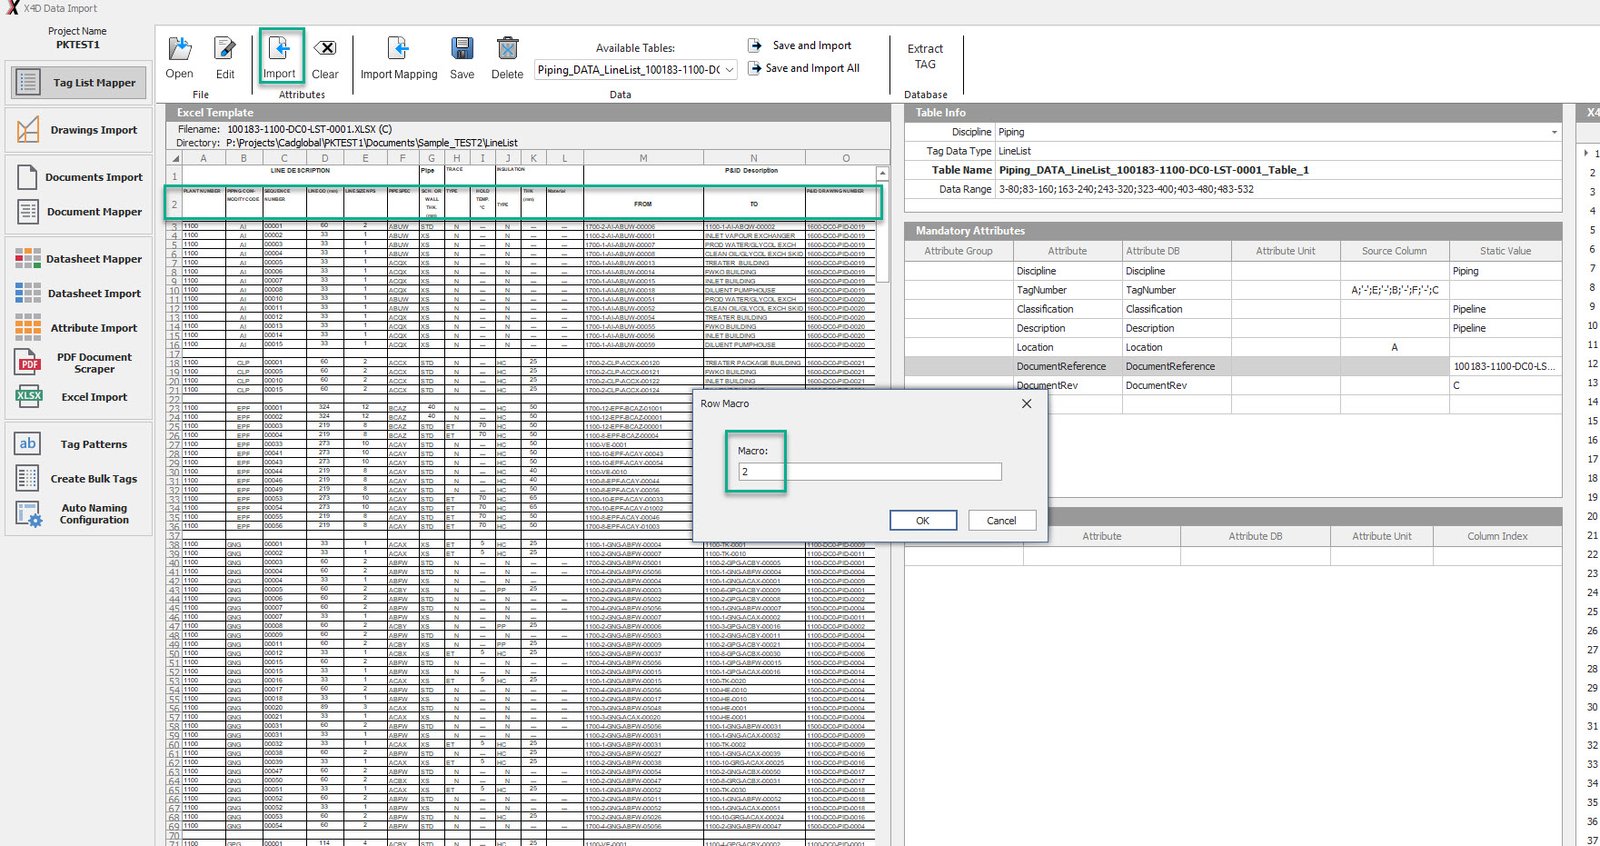
•Once done, Click "Import" and enter the Macro value in the pop up. If more than one value is to be entered, seperate it with a " ; ".
•Click OK
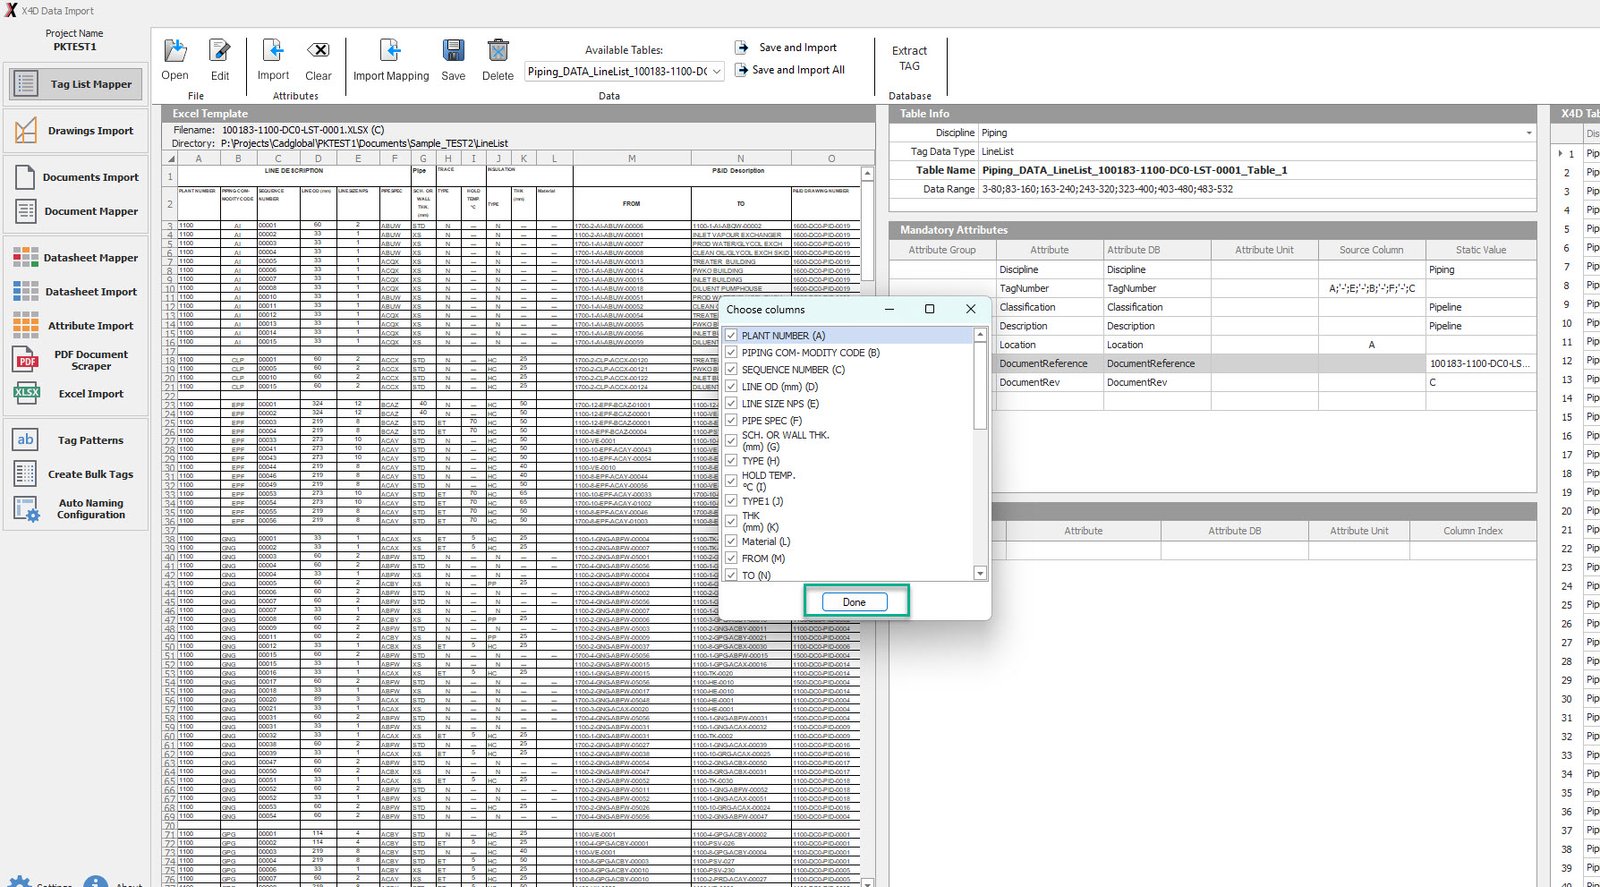
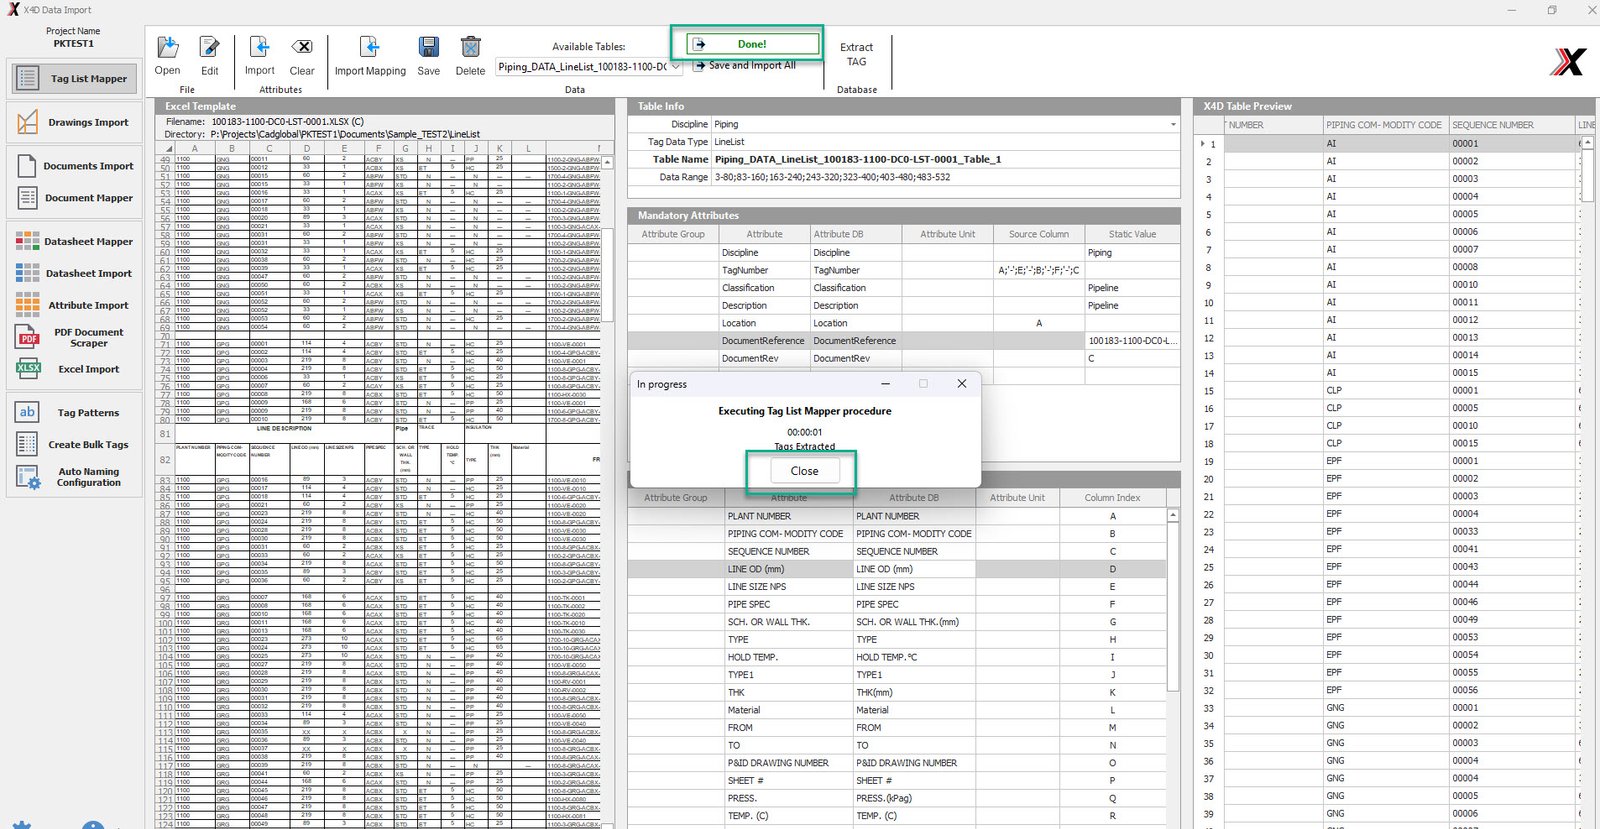
•Review the imported Columns and Click "Done".
•Review the Attribute DB Values and make any necessary corrections to them if needed.
•Once all the DB values have been reviewed and corrected, click on Save and Import.
•This would bring up a pop up. Click "Close" once it says Tags extracted.
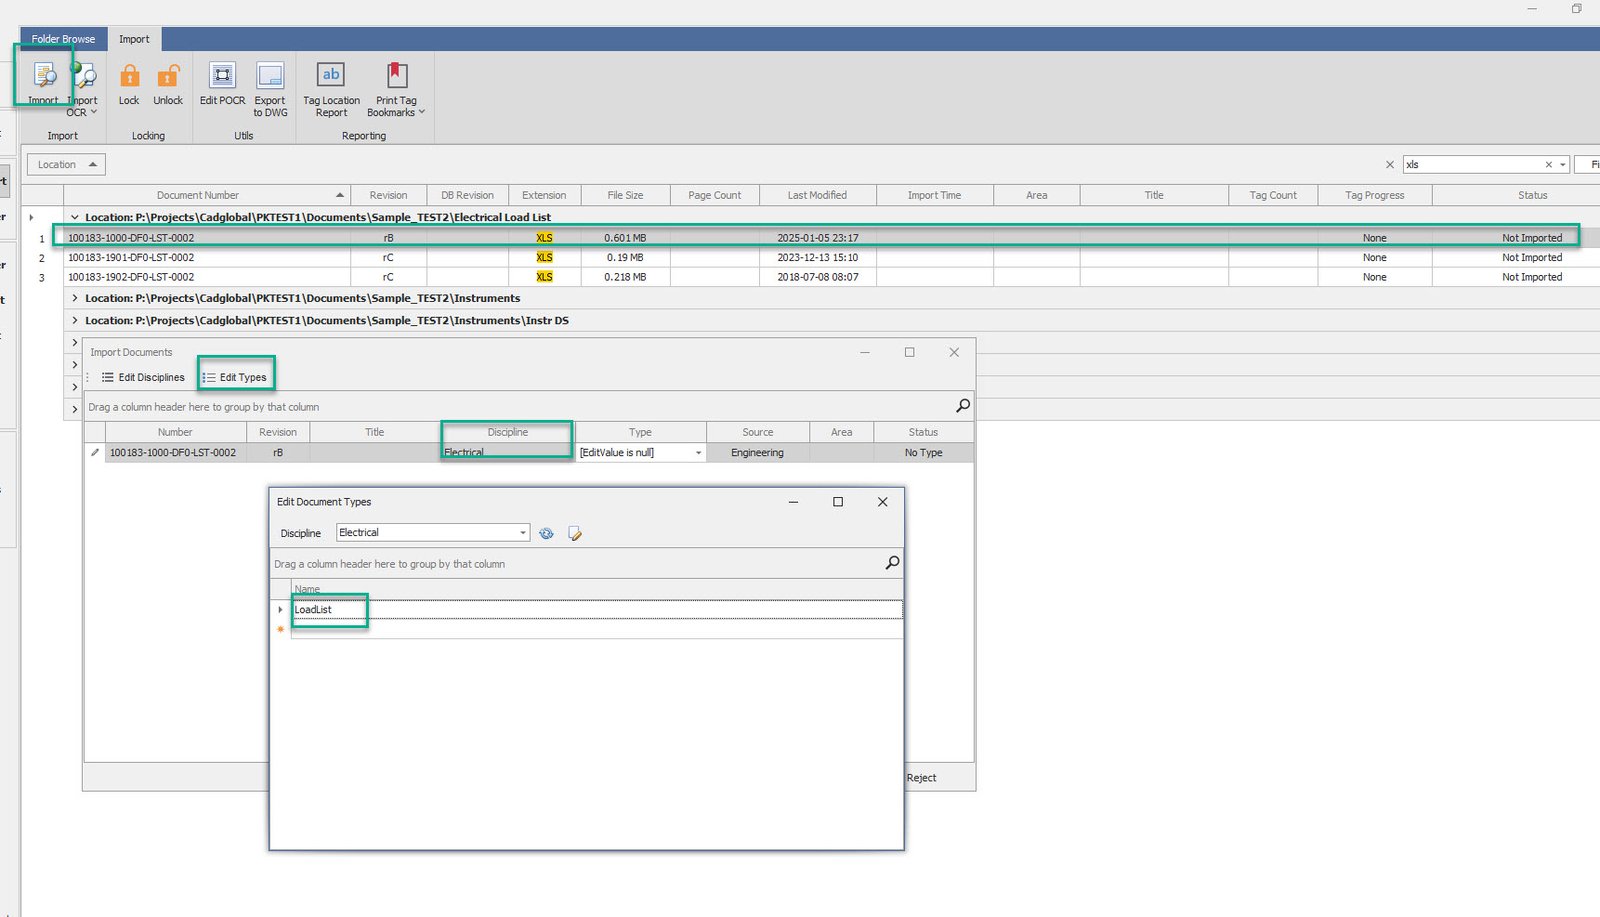
•Once done, go into Document Import and select the document from the Load List
•Enter the Area Code for the selected Document and click Import
•Select the Discipline and define the type in the Import Documents Pop up window
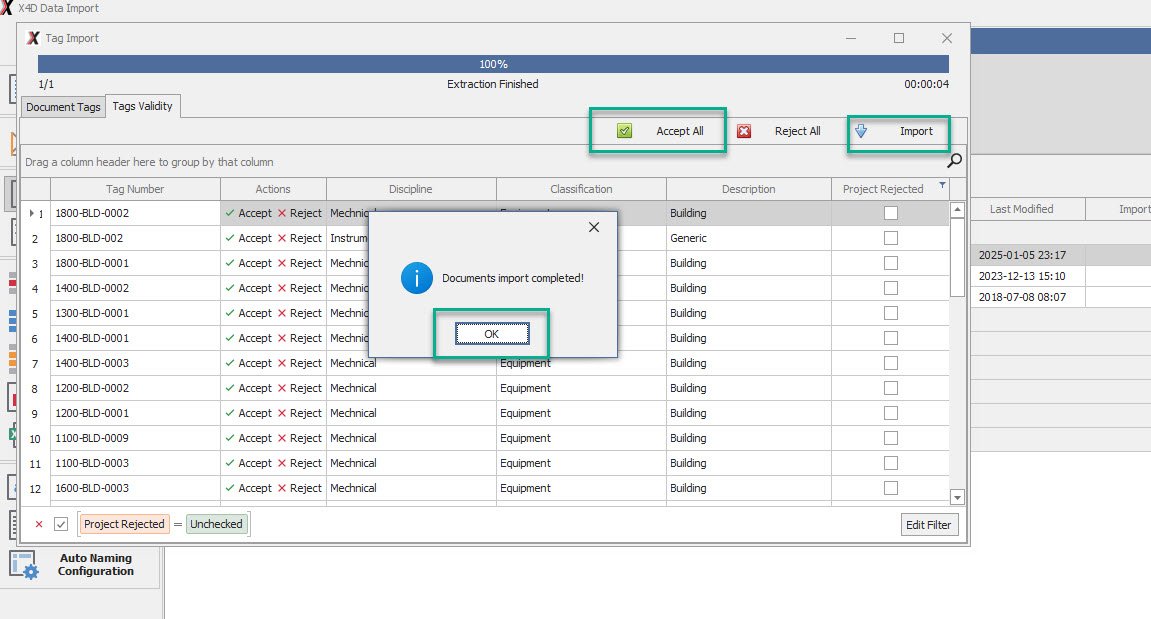
•Once done, Click "OK" on the confirmation pop up
•Review the Imported tags and Click Accept All and then Import
•Please do not close this window manually for successful import of the tags
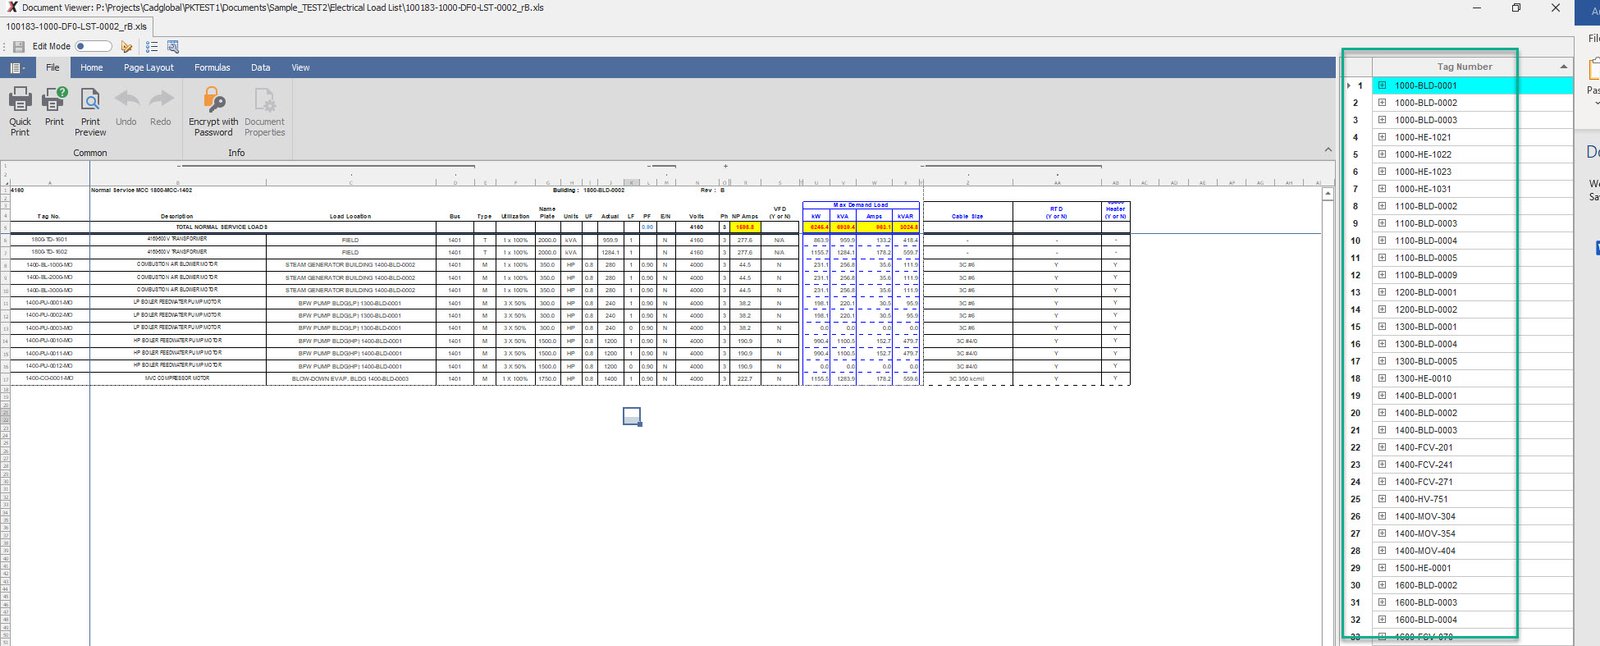
•Once the import is complete, open the file in the document viewer to review the tag locations
|